
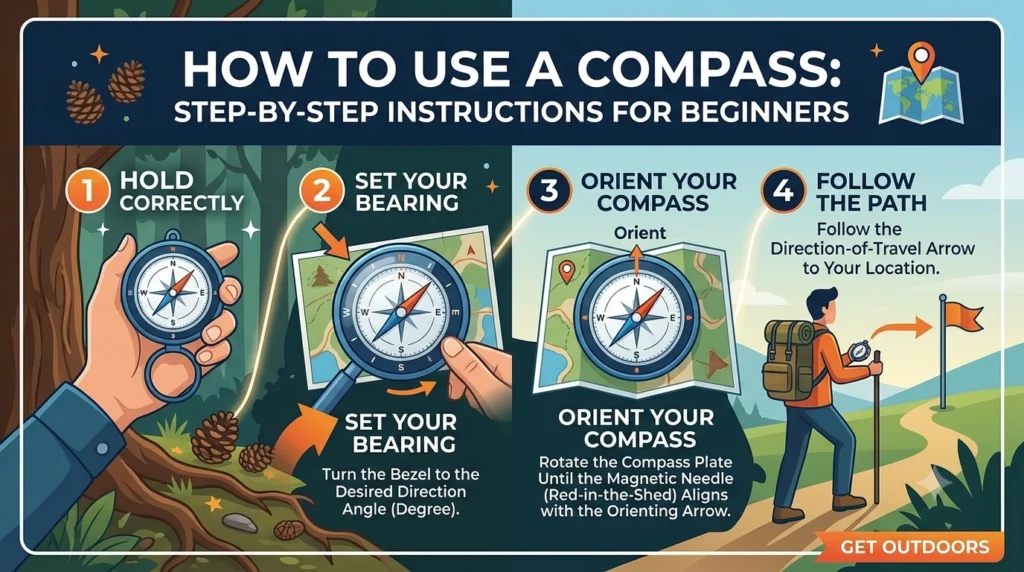
How to Use a Compass: Step-by-Step Instructions for Beginners.
Introduction
A compass is a simple but valuable navigation tool that helps you determine direction and navigate unfamiliar places. Whether you are hiking through a forest, exploring a mountain trail, camping outdoors or learning basic geography, understanding how to use a compass can make your journey safer and more organised.
Although smartphone navigation apps are convenient, they may not always be available when batteries run low, signals become unreliable or you are travelling through remote areas. A traditional magnetic compass works without an internet connection or electronic power, making it a useful skill to learn before heading outdoors.
The good news is that using a compass is not difficult. Once you understand its parts, learn how to identify north and practise following a direction, you can begin navigating with confidence.
This guide explains how to use a compass step by step, how to read compass directions, how to follow a bearing and how to combine a compass with a map.
Quick Answer: How Do You Use a Compass?
To use a basic magnetic compass, follow these steps:
- Hold the compass flat in your palm and keep it away from metal objects.
- Wait for the magnetic needle to settle.
- Turn your body and compass until the needle’s north end aligns with the north marking on the compass dial.
- Read the direction you are facing using the compass markings.
- If you are navigating to a destination, set a bearing and follow it using visible landmarks.
- When using a map, account for magnetic declination where necessary.
A compass helps you determine direction, but it does not automatically tell you your exact location. For more reliable navigation, combine it with a suitable map and an understanding of the surrounding terrain.
1. What Is a Compass?
A compass is a navigation instrument that helps you determine direction. A traditional magnetic compass contains a magnetised needle that aligns approximately with Earth’s magnetic field, with one end pointing towards magnetic north.
Compasses have been used for centuries in navigation, exploration, surveying and outdoor travel. Today, they remain useful for hikers, campers, sailors, travellers and anyone interested in learning traditional navigation skills.
A compass is particularly helpful when you need to:
- Identify north, south, east and west.
- Maintain a direction while walking.
- Navigate along hiking trails.
- Read and follow directions on a topographic map.
- Find a landmark using a measured bearing.
- Support navigation when electronic devices are unavailable.
According to the U.S. Geological Survey’s guide to map-and-compass navigation, combining a compass with a topographic map can help you determine directions and navigate between known locations.
However, a compass has limitations. It cannot independently identify your position, measure the distance to a destination or tell you whether a route is safe to travel.
2. Understanding the Parts of a Compass
Before learning how to use a compass, familiarise yourself with its main components. A standard baseplate compass is particularly useful for beginners because it can be used both on its own and with a map.
Magnetic needle
The magnetic needle is the moving pointer inside the compass. Its north-seeking end points approximately towards magnetic north.
Allow the needle to settle before taking a reading. Moving the compass too quickly can make it difficult to determine the correct direction.
Compass housing
The compass housing is the circular part that holds the magnetic needle and direction markings. On many navigation compasses, the housing can rotate to set a bearing.
Compass dial
The dial displays compass directions or degree measurements. A common compass uses a 360-degree scale to provide more precise directions.
Direction-of-travel arrow
This arrow shows the direction in which you intend to move after setting your bearing. It is especially important when following a particular route.
Orienting arrow
The orienting arrow is usually located inside the rotating compass housing. It helps you align the housing with the magnetic needle when following a bearing.
Baseplate
The baseplate is the flat, transparent or solid platform beneath the compass. On many models, it includes a direction-of-travel arrow, measurement scales and straight edges for working with maps.
Important: Compass designs vary. Check your compass’s instructions so you can correctly identify its markings and understand whether it has adjustable magnetic declination.
3. Learning the Four Main Compass Directions
Every beginner should learn the four cardinal directions before attempting more advanced navigation.
| Direction | Abbreviation | Degree reading |
|---|---|---|
| North | N | 0° or 360° |
| East | E | 90° |
| South | S | 180° |
| West | W | 270° |
These directions divide a full circle into four equal sections.
For example, if you are facing north and turn 90 degrees clockwise, you will face east. Another 90-degree clockwise turn takes you south, followed by west and then north again.
What are the intermediate directions?
You may also encounter four directions between the cardinal points:
- Northeast (NE): Approximately 45°.
- Southeast (SE): Approximately 135°.
- Southwest (SW): Approximately 225°.
- Northwest (NW): Approximately 315°.
These degree readings assume the standard convention of measuring clockwise from north.
Learning these directions makes it easier to understand map instructions, recognise landmarks and follow a planned route.
4. How to Use a Compass Step by Step
The easiest way to learn is to practise in an open, familiar area before using a compass on a remote trail.
Step 1: Choose a suitable location
Find a safe, open space where you can practise without traffic, steep drops or other hazards.
Move away from objects that may interfere with the magnetic needle, including vehicles, large metal structures, some electronic devices and magnetic accessories.
Step 2: Hold the compass correctly
Place the compass flat in your palm, approximately at waist or chest height. Keep it level so the needle can move freely.
Avoid holding it close to a metal belt buckle, keys or other magnetic objects. These may affect the reading.
Step 3: Wait for the needle to settle
Give the magnetic needle a moment to stop swinging. Identify its north-seeking end and compare it with the compass markings.
Do not start turning immediately if the needle is still moving.
Step 4: Align yourself with north
Turn your entire body slowly while keeping the compass level. Continue until the needle’s north end aligns with the north marking on the compass dial.
On a simple compass, this gives you an approximate north-facing direction. On a baseplate compass, make sure you understand which markings are intended for taking a basic direction reading and which are used to follow a bearing.
Step 5: Identify your direction
Once you have established north, use the compass markings to understand the direction you are facing.
For example, if you are facing approximately 90 degrees clockwise from north, you are facing east. A reading near 180 degrees indicates south.
Step 6: Choose a landmark
Select a visible landmark in the direction you want to travel. It might be a distinctive tree, a building, a trail junction or a clearly visible hill.
Walk towards that landmark while periodically checking your direction. When you reach it, take another reading and choose the next landmark.
This method helps you maintain a direction without needing to stare at the compass continuously.
Step 7: Check your surroundings
Compare the direction shown by your compass with the landscape around you. If the terrain, trail or visible landmarks do not match your expectations, stop and reassess your position instead of continuing blindly.
Practising these steps regularly will help you become more comfortable with compass navigation.
5. How to Find North With a Compass
Finding north is one of the most basic compass skills, and it is a useful starting point for beginners.
Follow this process:
- Move away from nearby metal objects or other potential sources of magnetic interference.
- Hold the compass horizontally.
- Wait until the needle settles.
- Identify the needle’s north-seeking end.
- Rotate your body until that end aligns with the compass’s north reference.
- Look ahead in the direction indicated by the north marking.
You have now established an approximate north-facing direction.
Is compass north the same as true north?
Not necessarily. A magnetic compass responds to Earth’s magnetic field, so its needle points towards magnetic north rather than directly towards geographic, or true, north.
The angular difference between these directions is known as magnetic declination. Its value depends on your location and changes over time.
For basic practice in an open area, finding magnetic north may be enough. When navigating with a map, however, you may need to account for declination to maintain an accurate course.
The National Park Service’s compass guidance explains why magnetic north and true north differ and why this matters for outdoor navigation.
6. How to Use a Compass With a Map
Using a compass alongside a map provides more information than using either tool alone. A suitable topographic map shows features of the terrain, while the compass helps you determine and maintain direction.
Step 1: Find your location and destination
Locate your approximate starting position and intended destination on the map.
Look for recognisable features, such as rivers, roads, trail junctions, hills or buildings, that can help you confirm where you are.
Step 2: Align the compass with your route
Place the compass baseplate on the map so that its direction-of-travel arrow points from your starting point towards your destination.
Keep the baseplate aligned with the route you intend to follow.
Step 3: Set the bearing
Rotate the compass housing until its orienting lines are parallel to the map’s north-south grid lines, with the north reference pointing towards the map’s north.
Read the bearing at the compass’s index mark. Ensure that you understand whether the map uses grid north or true north and whether your compass is already adjusted for declination.
Step 4: Account for magnetic declination
Map north and magnetic north may differ. Check the map’s declination information and your compass instructions to determine the correct adjustment.
The required calculation depends on the bearing reference, the direction of declination and whether your compass has an adjustable setting. Avoid applying a generic adjustment without checking these details.
Step 5: Follow the bearing on the ground
Hold the compass level in front of you, with the direction-of-travel arrow pointing away from your body.
Turn yourself and the compass together until the north-seeking needle aligns with the orienting arrow. Choose a landmark along the direction-of-travel arrow and walk towards it.
Repeat this process as needed, checking your location against the map along the way.
For a detailed explanation, consult the USGS instructions for using a compass with a topographic map.
7. How to Follow a Compass Bearing
A bearing is a direction expressed as an angle, usually measured clockwise from north. It helps you travel along a chosen direction rather than relying only on general descriptions such as east or southwest.
For example, a bearing of 90 degrees indicates east, while 180 degrees indicates south.
How to set a bearing
Suppose you want to travel towards a landmark at a bearing of 60 degrees.
- Hold your baseplate compass horizontally.
- Rotate the compass housing until 60 degrees aligns with the index mark.
- Point the direction-of-travel arrow away from you.
- Turn your body until the needle’s north end aligns with the orienting arrow.
- Identify a landmark directly along the travel arrow.
- Walk towards the landmark, then repeat the alignment process.
This example assumes the bearing has already been expressed in the reference system used by your compass. When a map bearing needs declination adjustment, make that adjustment first.
Why should you use landmarks?
Following a bearing by simply looking down at a compass can cause you to drift off course. Landmarks provide a practical reference point, allowing you to walk a short section of the route and check your direction again.
In dense forests or uneven terrain, you may need to select closer landmarks. If your chosen landmark is hidden or the route becomes unsafe, stop and reassess rather than forcing a straight line through obstacles.
8. What Is Magnetic Declination?
Magnetic declination is the angle between true north and magnetic north at a particular location.
The distinction matters because maps and navigation devices may use different north references. If you follow a map bearing without accounting for the difference, your compass direction may not match the intended route.
Why does declination change?
Earth’s magnetic field changes over time, and the relationship between magnetic north and true north also varies by location. Consequently, a declination value printed on an older map may no longer be accurate.
How should beginners handle declination?
Use these precautions:
- Check the declination information for the area where you will navigate.
- Use a current, suitable map whenever possible.
- Read your compass manufacturer’s instructions before adjusting its settings.
- Confirm whether your map bearing refers to true north, grid north or magnetic north.
- Practise the adjustment in a safe area before relying on it outdoors.
Do not assume that one declination value applies everywhere. A correction appropriate for one region may be unsuitable for another.
9. Common Compass-Reading Mistakes
Even a straightforward navigation tool can produce misleading results when used incorrectly. Understanding the most common mistakes can help you avoid unnecessary confusion.
Holding the compass at an angle
A compass that is tilted may not give a reliable reading. Keep it as level as possible and allow the needle to settle.
Standing too close to metal
Keys, vehicles, steel structures and other sources of magnetic interference can affect the needle. Move away from them and check whether the reading changes.
Confusing magnetic north with true north
The two directions are not always identical. When using a map, check its north reference and account for declination as required.
Rotating the wrong part of the compass
When setting a bearing, beginners sometimes rotate the entire compass instead of adjusting the housing, or they move the housing after it has been set. Learn which part should move at each stage.
Reading the wrong direction
A line can represent two opposite bearings, 180 degrees apart. Always confirm that your direction-of-travel arrow points towards your intended destination.
Walking without checking landmarks
Following a compass for a long distance without checking your surroundings can make it harder to recognise a wrong turn. Break your route into manageable sections and check your progress regularly.
Relying on a compass alone
A compass does not show your exact position, terrain hazards or the safest path. Combine it with a map, environmental awareness and a realistic understanding of your route.
10. Practical Tips for Beginners
You do not need to master every navigation technique on your first attempt. Start with the basics and build your skills gradually.
Practise in a familiar place. Learn to identify the four cardinal directions in a park, garden or open field before navigating an unfamiliar area.
Use a physical map. A suitable topographic map helps you understand how paths, terrain features and distances relate to one another.
Learn to recognise landmarks. Distinctive features make it easier to check your direction and confirm progress.
Keep your compass accessible. Store it where you can reach it quickly, and check it periodically for damage or problems with the needle.
Learn your equipment. A basic compass and a baseplate compass may have different markings or functions. Read the instructions for your particular model.
Carry backup navigation tools. A charged phone, downloaded maps and an appropriate emergency communication device can provide additional support. Do not assume that an electronic device will always work.
Tell someone about your route. Before travelling into a remote area, share your plans and expected return time with a trusted person.
Know when to stop. If you become uncertain about your location or direction, pause in a safe place, assess your surroundings and consult your map. Avoid making hurried decisions when visibility is poor or conditions are deteriorating.
For more structured practice, the National Park Service’s compass and GPS activities provide additional ideas for learning navigation.
11. Final Thoughts
Learning how to use a compass is a practical skill that can improve your confidence when exploring unfamiliar places. By understanding the compass needle, learning the cardinal directions and practising how to follow a bearing, you can build a solid foundation in navigation.
Start with simple exercises in a familiar location. As your confidence grows, practise using a compass with a map, learn how magnetic declination affects your readings and become comfortable checking your route against visible landmarks.
Most importantly, remember that reliable navigation involves more than following a needle. A compass works best when combined with map-reading skills, careful planning, awareness of the terrain and sensible safety precautions.
With regular practice, this small instrument can become a valuable part of your outdoor equipment.
How do you use a compass for beginners?
Hold the compass flat, wait for the magnetic needle to settle and identify its north-seeking end. Rotate your body until the needle aligns with the north reference, then use the compass markings to determine your direction. Practise in an open, familiar area before navigating outdoors.
How do you know which way is north on a compass?
The north-seeking end of the magnetic needle points approximately towards magnetic north. Hold the compass level and away from magnetic interference, then allow the needle to settle before reading it.
What are the four main directions on a compass?
The four cardinal directions are north, east, south and west. Their standard degree readings are 0° or 360°, 90°, 180° and 270°, respectively.
Can you use a compass without a map?
Yes. A compass can help you determine direction and follow a bearing without a map. However, a map provides valuable information about your location, terrain and possible routes, so carrying both is preferable when travelling in unfamiliar outdoor areas.
Does a compass always point to the North Pole?
No. A traditional magnetic compass aligns with Earth’s magnetic field and points towards magnetic north, not directly towards the geographic North Pole. The angular difference is called magnetic declination.